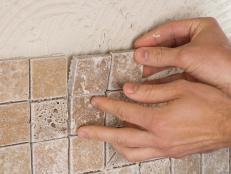
Stone Backsplash Combines Functionality, Decoration


A stone backsplash around your countertop will not only make your wall more attractive but also help protect it from damage caused by water or grease spatters.
Installing a stone-tile backsplash requires intermediate-level skills and takes approximately two days for two people. The cost of the project is usually about $200 for a medium-sized kitchen.
Note: Stone tiles are usually fairly large and require spacers to help ensure straight grout lines.
Materials and Tools:
Wet saw
Diamond-blade metal grinder
Notched trowel
Grout float
Stone tiles
1/4" spacers
Mastic adhesive
Drill with mixing attachment
Grout
Level
Safety glasses
Tiling
1. Make sure the backsplash on your countertop is level. Then place a tile against the wall on top of the enclosure, mark the wall at the top of the tile, and draw a level reference line around the entire area to be tiled. If the enclosure is not level, base your reference line on a tile placed at the lowest point of the top of the enclosure.
If the countertop backsplash isn't level, you'll need to use the reference line as a starting point to help you keep the tiles lined up. You may want to line up the top of a board with the reference line and attach it to the wall for added support when you apply the tiles. After the tiles are in place, remove the board, cut the tiles to size, and install them along the top of the backsplash.
If you're installing large tiles that will fill the space between the backsplash and the top cabinets, you don't need to worry about the backsplash being level.
2. Locate and mark the center point of each area to be tiled.
3. Make a "dry run," lining up the edge of one tile with the center mark and then "leap frogging" tile pieces side by side to determine how many pieces will be needed and what the end pieces will look like. If the end pieces will be very small, repeat the dry run, centering the first tile on the center mark. This will allow you to cut larger and more attractive corner pieces.
If one side of your tile work will have exposed edges, use whole tiles near the edge and cut only the tiles that will be close to the wall.
4. Scoop out a large dollop of mastic adhesive with the notched trowel and spread it on the wall, starting at the center mark. Spread the mastic up to the reference line. Then spread the mastic horizontally. Hold the trowel at a 45-degree angle when spreading mastic. The trowel's notches help ensure an even distribution of the adhesive. Spread only as much adhesive as you can tile in 10 minutes.
5. Beginning at the center mark, set the tiles firmly in place in a straight row, making sure the spacers are in place. Do not set corner pieces in place yet unless no cutting is required.
6. Trim tiles as necessary to accommodate electrical outlets. Measure the position of the outlet, and transfer the measurement to the tile. Use a wet saw or a diamond -blade metal grinder to cut out the openings for fixtures. Start cutting the tile from the front, but don't cut all the way to the corner.
7. Turn the tile over, and finish cutting out the corners from the back of the tile. Always wear safety glasses when cutting tile.
8. After the first row is complete, begin the second. Repeat this process until the tiles have reached the desired height. Periodically check your work to make sure the rows are level.
9. Cut corner tiles to size with a wet saw. Set corner pieces in place with the cut edges facing the corners. This will make them harder to detect when the project is finished.
Applying Grout
After the tile has set, begin applying grout. Use unsanded grout for small grout lines and for glazed tiles. Grout comes in a wide variety of colors. For a seamless look, choose one that matches the tile.
1. Mix the grout to the consistency of peanut butter. You can use a mixing attachment on a variable-speed drill set at low speed.
2. If your stone tiles absorb moisture quickly, wet them before applying grout so they won't soak up moisture from the grout too quickly.
3. Apply the grout with a rubber grout float. If there's a lot of space between grout lines, you can work on each line individually.
4. Allow the grout to set for about 10 minutes, then wipe off the excess. Wipe at a 45-degree angle to avoid removing too much grout from the grout line.
5. Wipe a stone sealant onto the tiles, and allow it to dry.
6. Replace the receptacles in the wall. You'll need longer screws to compensate for the thickness of the stone.

.-Battle-on-the-Beach-courtesy-of-HGTV.-.jpg.rend.hgtvcom.196.196.suffix/1714761529029.jpeg)


