Halloween Kids' Craft: Jack-O’-Lantern Flipbook
Inspire ghosts and ghouls of all ages this Halloween with a jack-o'-lantern flipbook that's as unique as their imagination.

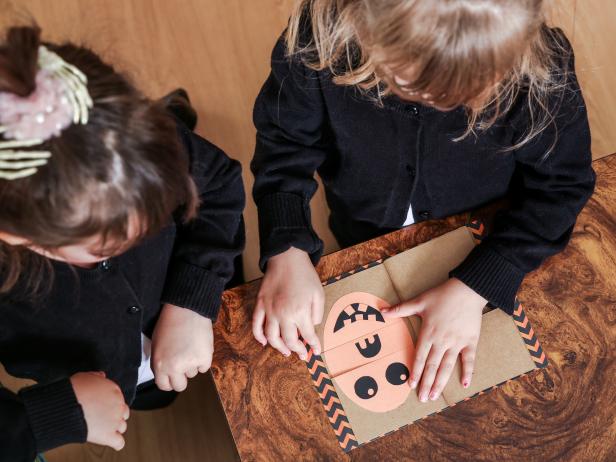
Jack-o’-lanterns are like snowflakes in that no two are alike. This easy flipbook idea takes the same concept from pumpkin to paper. Kids will love creating different jack-o'-lantern faces with each flip of the page.
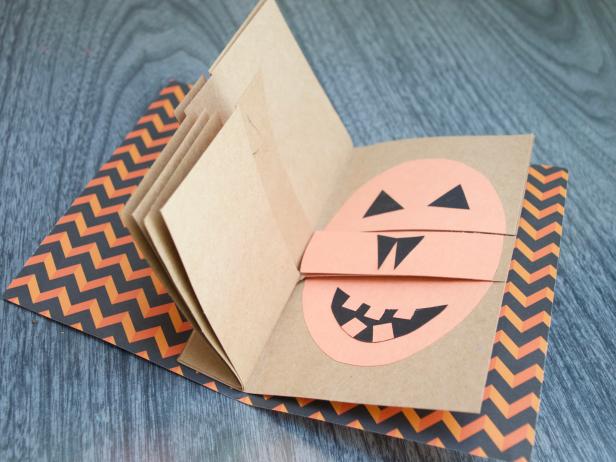
Tools and Materials:
- card stock paper
- orange and black construction paper
- scissors
- ruler
- stapler
- glue stick
- Halloween-themed paper
- oval shape to use as a template for the face shape
- pencil
1. Prep Card Stock for the Pages
Cut six pieces of card stock paper measuring to 4-1/2” x 6-1/2”.

2. Make the Book Cover
Cut a piece of decorative paper to 4-1/2” x 6-1/2” to create the cover for the flipbook. Fold the paper in half lengthwise. Decorate the cover as desired.
3. Fold the Card Stock Pages
Make a one-inch fold in the card stock pages lengthwise and fold them into the cover for the book’s spine. Use the straight edge of the ruler to create a sharp crease.
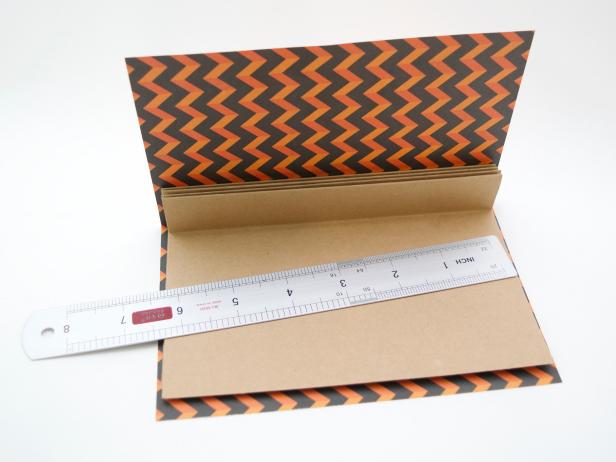
4. Make Oval Face Shapes
Make a template for the oval face, approximately 5” x 3-1/2”. Make it so it takes up most of the space of the book page. Using a template to trace the shape of each face will make it easy and keep them all a uniform size. Use your template to trace the ovals onto the orange construction paper. We made six pages for our book.
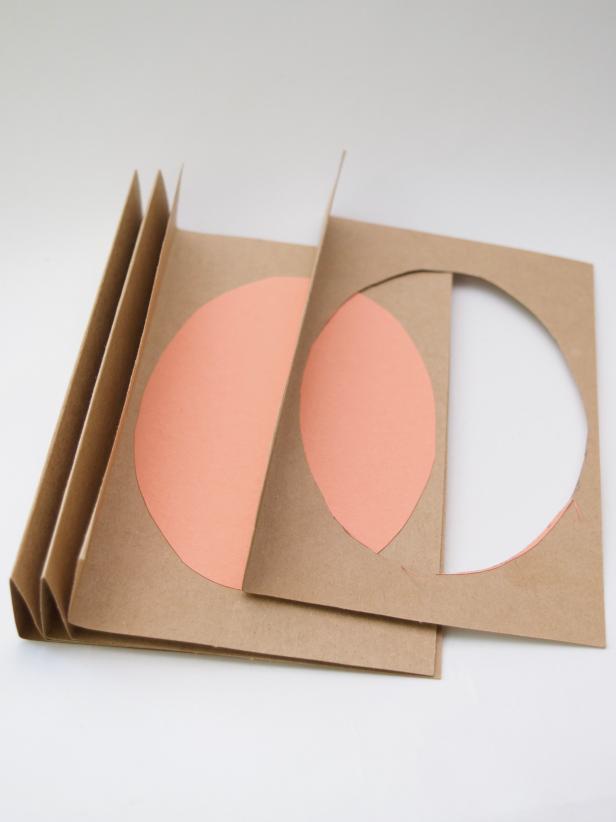
5. Cut and Glue the Face Shapes Onto Each Page
Cut out each oval and then use a glue stick to attach one oval to each piece of the card stock (book page). Lining up the ovals on all the pages is important for the flipbook to work properly.
6. Cut Face Sections
Divide each page into three sections. The top section where the eyes will be measures 2-1/2”; the middle where the noses will be measures 1” and the bottom section for the mouth will measure 2-1/2”. Cut each page into three sections taking care to only cut up to the fold on the book’s spine.
7. Fasten Pages to Spine
Using a stapler attach the 1” folded section of the card stock pages to the cover.

8. Make Facial Features
Use black construction paper to make eyes, noses and mouths. Make triangles for eyes and noses, smiles, frowns and any other fun jack-o’-lantern features. Make sure all the eyes and mouth options are under 2-1/2” tall and all noses are under 1” tall.
9. Glue on Facial Features
Use a glue stick to attach all the facial features to the pages of the book.
Jen Perkins
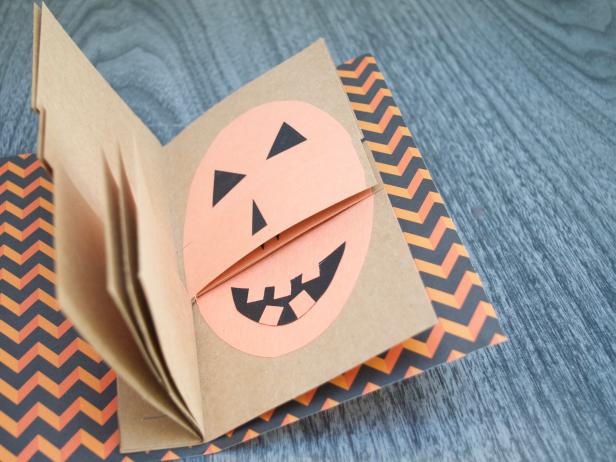
Kids will love flipping the pages and making various face options. The more pages you add, the more jack-o’-lantern possibilities. Try this same idea with monsters and more.
Jen Perkins

.-Battle-on-the-Beach-courtesy-of-HGTV.-.jpg.rend.hgtvcom.196.196.suffix/1714761529029.jpeg)


