How to Install a Garbage Disposal
Say goodbye to smelly food scraps and hello to a new garbage disposal.
Kamron Sanders
You can install a new garbage disposal yourself with these step-by-step instructions, and some basic electrical and plumbing know-how.

Garbage disposals make our lives easier and keep our kitchens cleaner by grinding up most food waste at the push of a button. However, like other appliances, they wear out after a few years. Some garbage disposal issues can be fixed, while others require full replacement. Whether you’re replacing a broken garbage disposal or outfitting your kitchen with its first garbage disposal, the process is simpler than it may seem.
Installing a new garbage disposal does require some basic plumbing and electrical know-how, so keep that in mind before you begin. Here, we’ve laid out step-by-step instructions for installing a garbage disposal yourself.
Before You Begin
Before you install a garbage disposal, check with your local codes for approval and to ensure your plumbing system is equipped to handle it. If you don’t already have a garbage disposal or you plan to get a larger one, take time to measure the area beneath your sink and examine the layout of your drain to ensure a disposal will fit properly.
When to Hire a Professional
If your drain isn’t positioned on the floor or low enough on the wall, it may not be compatible with a garbage disposal, as the discharge of the disposal must be positioned above the drain for proper water flow. If this is the case, the drain must be repositioned, which may warrant a call to a plumber.
If you don't already have a garbage disposal or an electrical supply such as a GFCI outlet beneath your sink, a wire must be run from the electrical box to the cabinet and a switch installed. If you aren't confident in your wiring skills, we suggest hiring an electrician.
Removing Your Old Garbage Disposal
How to Remove a Garbage Disposal
Removing a garbage disposal may seem intimidating, but it's a deceptively easy DIY job.
How to Install a Garbage Disposal
Tools + Supplies
- garbage disposal and mounting hardware
- screwdriver
- tongue-and-groove pliers
- basket strainer wrench
- plumber's putty
- bucket
- hammer
- hacksaw (optional)
- assorted PVC drain and trap fittings (optional)
- wire nuts
- electrical wire strain-relief clamp
- rags
- garbage disposal power cord (optional)
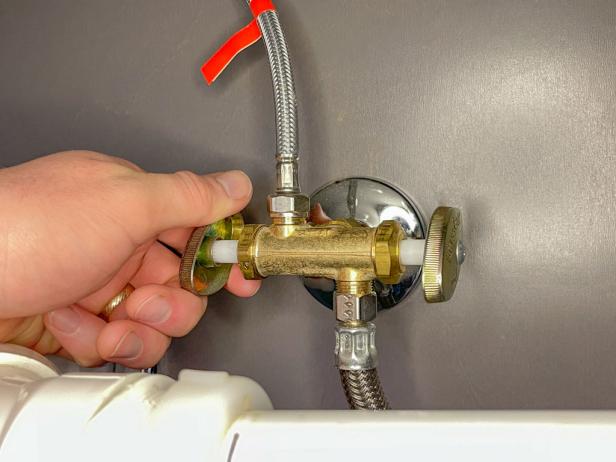
1. Turn Off the Water
While you don’t have to turn the water off to install a disposal, it will help you avoid accidentally making a mess if you happen to open the faucet while the plumbing is disconnected.
Kamron Sanders
2. Remove the Drain and Trap
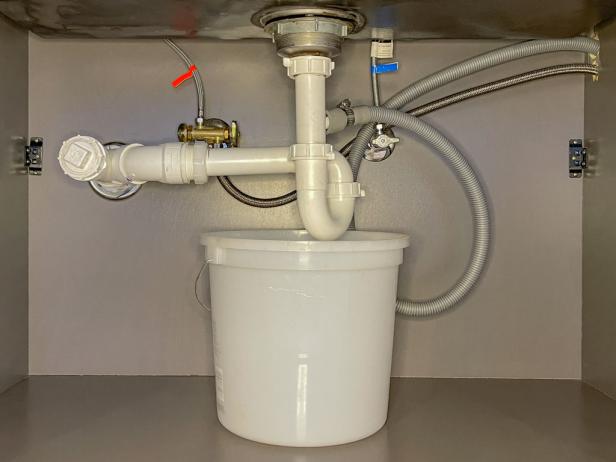
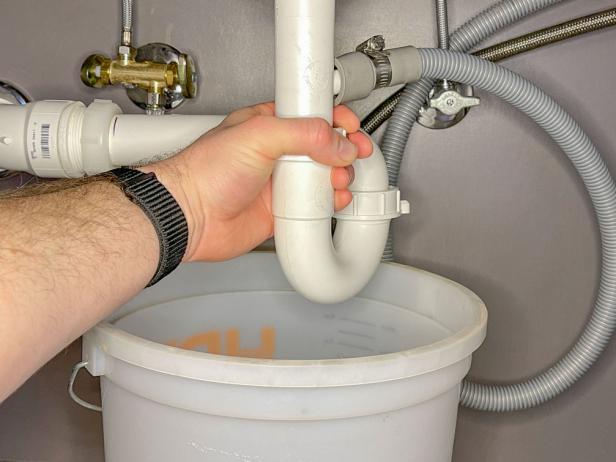
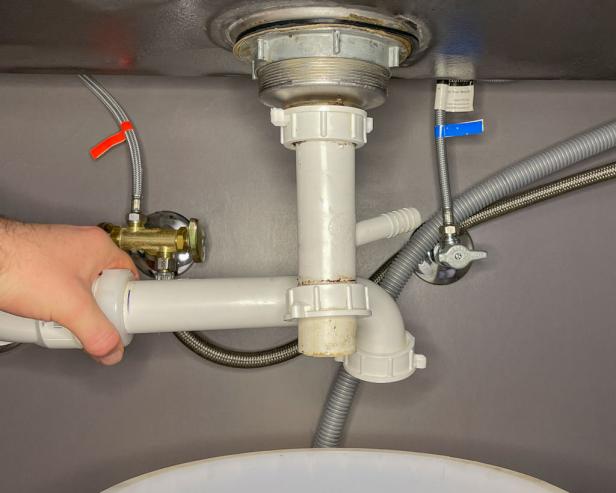
Slide a bucket beneath the P-trap and begin loosening the nuts, removing each piece of pipe (Images 1-3). While you can use pliers, they’re typically only hand-tight. You'll likely end up reusing many of the drain and trap components, so set them to the side until the project is complete.
Kamron Sanders
Kamron Sanders
Kamron Sanders
3. Remove the Tailpiece and Drain Flange
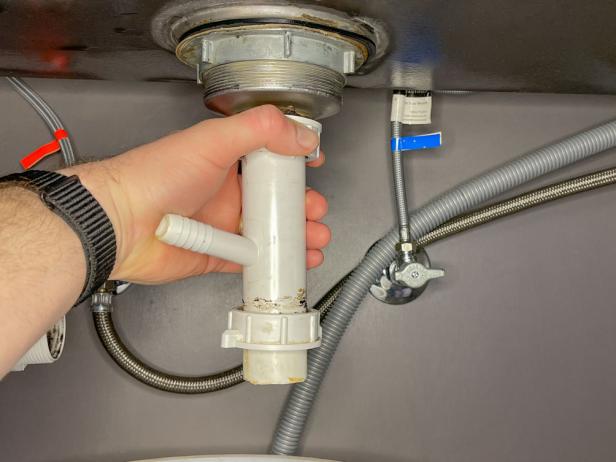
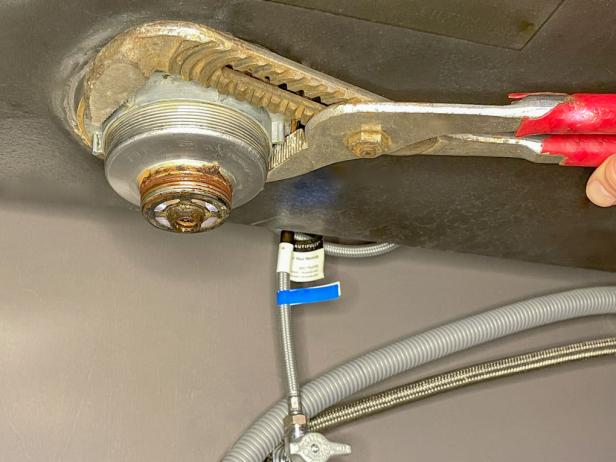
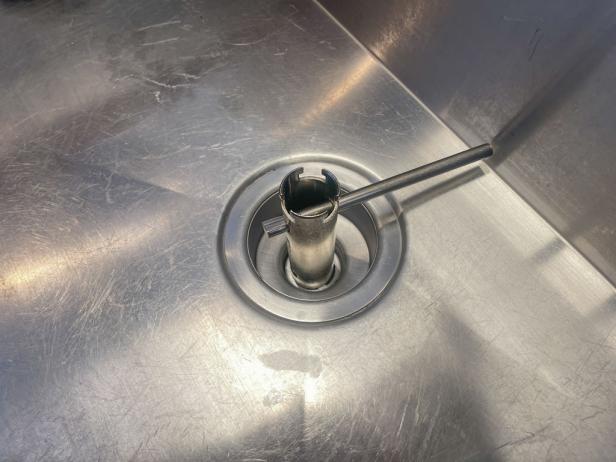
Remove the dishwasher drain hose if present by unscrewing the hose clamp (Image 1). Unscrew the tailpiece from the drain flange (Image 2), then remove the nut on the bottom of the flange using a flange wrench or a large set of tongue-and-groove pliers (Image 3). To keep the flange from spinning as you attempt to loosen the nut, use a basket strainer wrench to hold it in place (Image 4). This may require a helping hand.

Kamron Sanders
Kamron Sanders
Kamron Sanders
Kamron Sanders
4. Remove the Old Plumber’s Putty
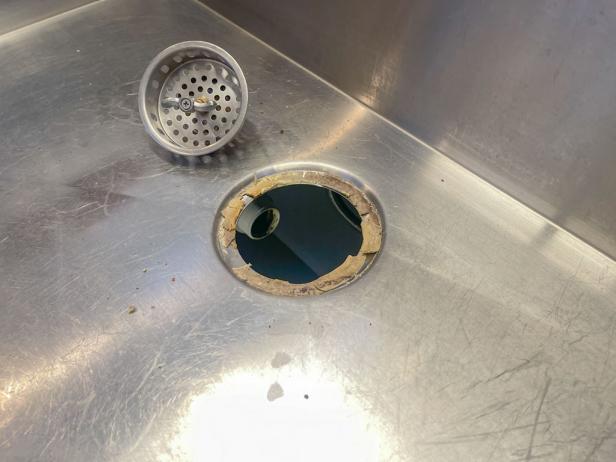
Once the drain flange is removed, clean up all the old plumber’s putty and wipe the sink hole until totally clean and free of residue.
Kamron Sanders
5. Install the Garbage Disposal Sink Flange
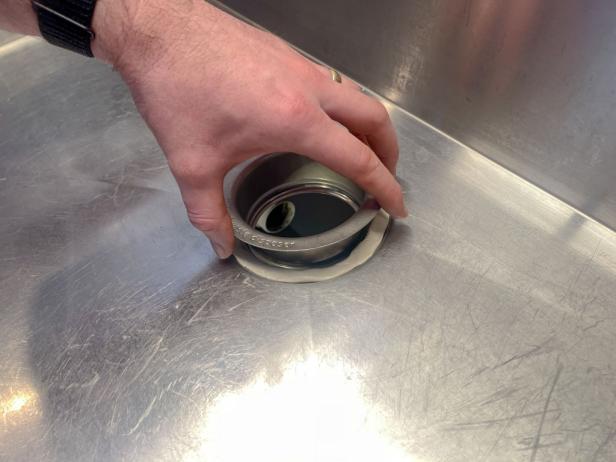
Install a new ring of plumber’s putty. To do so, roll out a solid piece of plumber’s putty in a 3/8-inch snake-like shape, then wrap it around the edge of the hole (Image 1). Place the garbage disposal's sink flange over the putty, centered over the hole, then press it down evenly (Image 2).

Kamron Sanders
Kamron Sanders
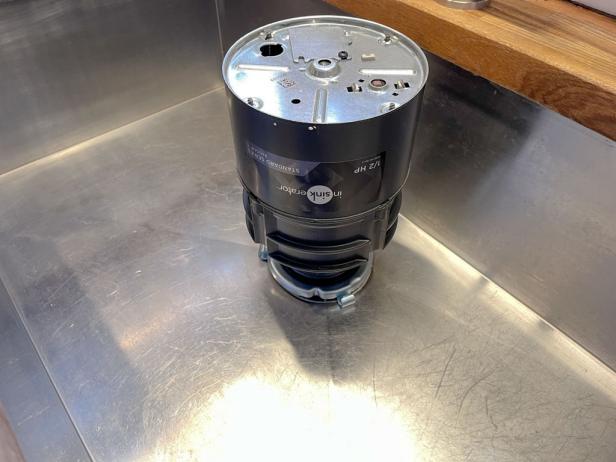
Pro Tip: Place the garbage disposal on top of the drain flange to hold it down as you connect the drain flange underneath the sink.
Kamron Sanders
6. Install the Flange Hardware and Mounting Ring
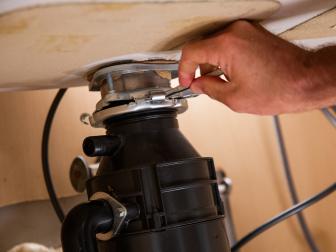
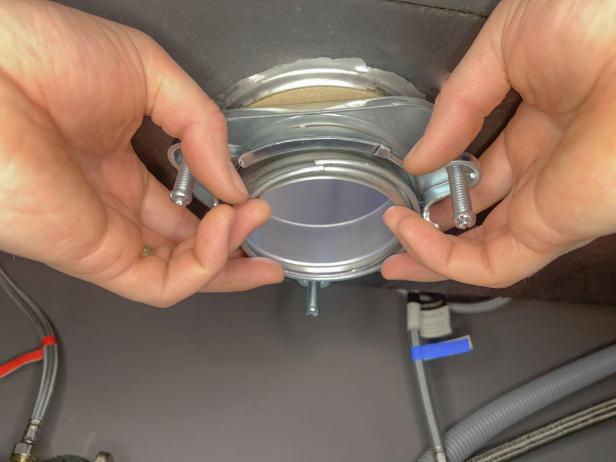
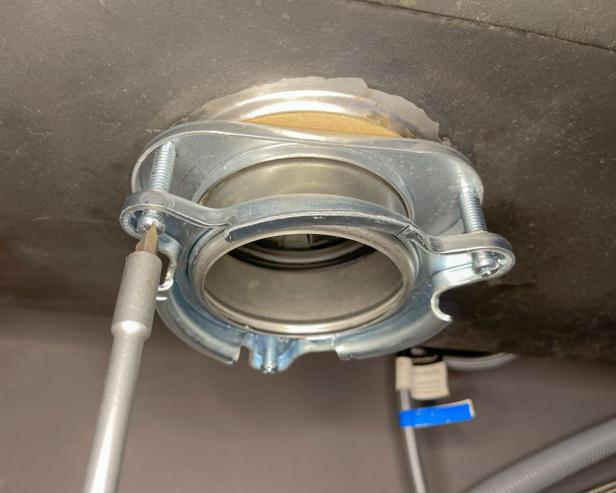
Slide the drain flange hardware over the bottom of the sink flange and install the snap ring to hold it in place (Image 1). Consult the manufacturer's instructions to ensure you install the hardware in the correct order. Tighten the three screws on the hardware to pull the basket tight against the sink (Image 2), then wipe away the excess plumber’s putty. To promote even tightening, alternate screws as you tighten rather than fully tightening each screw sequentially.
Kamron Sanders
Kamron Sanders
7. Wire the Garbage Disposal
Make sure the power is turned off before attempting to wire a disposal.
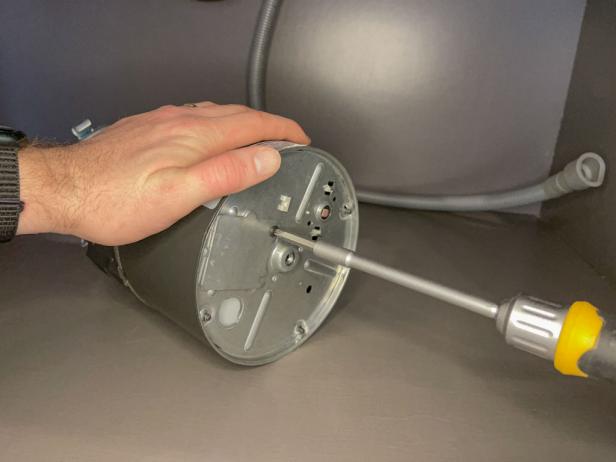
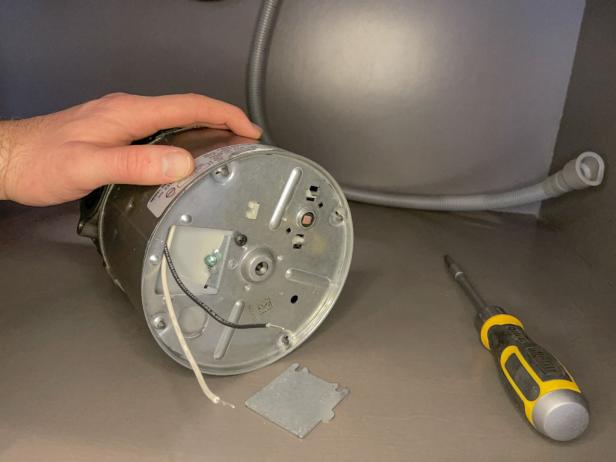
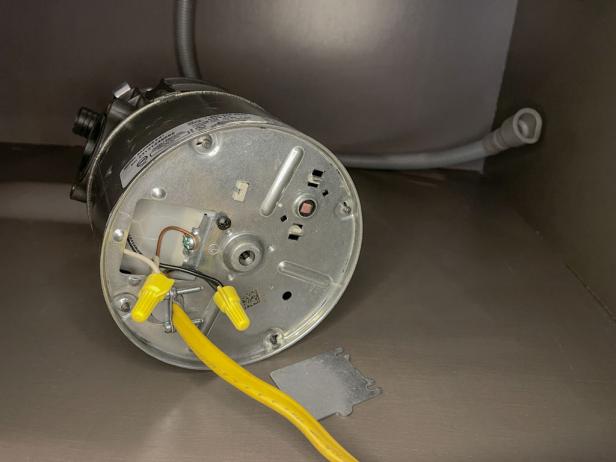
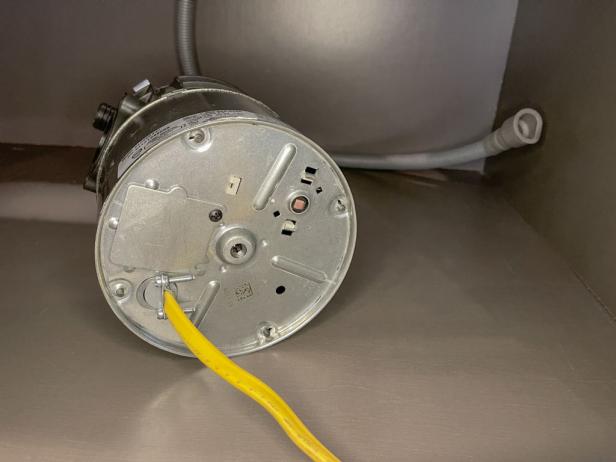
Remove the electrical cover on the bottom of the garbage disposal (Images 1 & 2) and install a strain relief fitting. Slide the wire through the fitting and connect the wires according to the color codes using wire nuts (Image 3). Tuck the wire nuts into the disposal and replace the cover (Image 4). If you plan to plug the garbage disposal into a GFCI outlet rather than hardwiring it, install a garbage disposal power cord following the same process.
Kamron Sanders
Kamron Sanders
Kamron Sanders
Kamron Sanders
8. Knockout the Dishwasher Drain (optional)
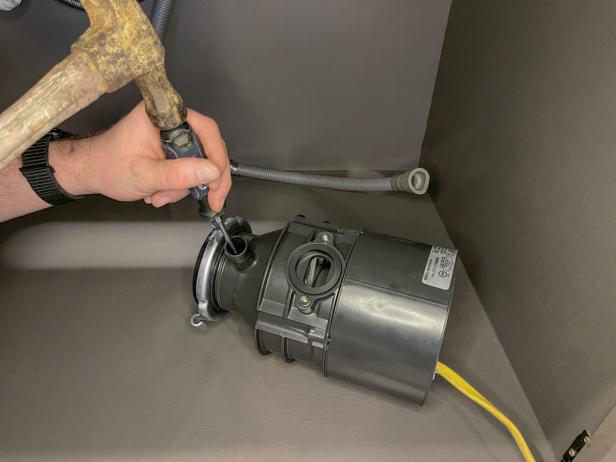
If you have a dishwasher, use a screwdriver and hammer to knock out the plastic in the dishwasher drain hole. Turn the disposal over to remove the plastic piece.
Kamron Sanders
9. Mount the Garbage Disposal
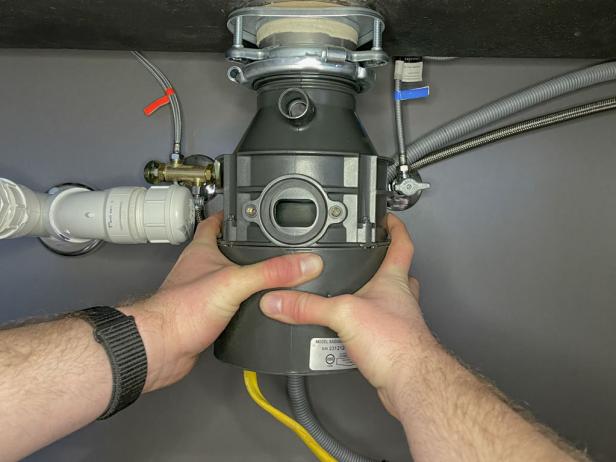
Mount the garbage disposal by sliding it onto the mounting hardware and turning it until tight (Images 1-2). To fully tighten it, place the provided tool into the rings on the mounting hardware and turn until it locks in place (Image 3). You'll know it has locked in place when you feel it subtly click into position.
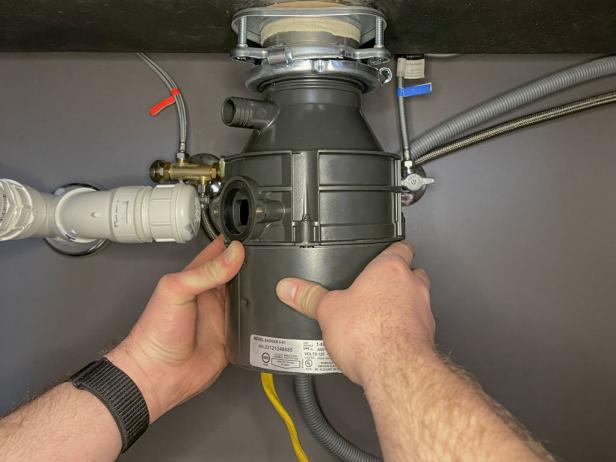
Kamron Sanders

Kamron Sanders
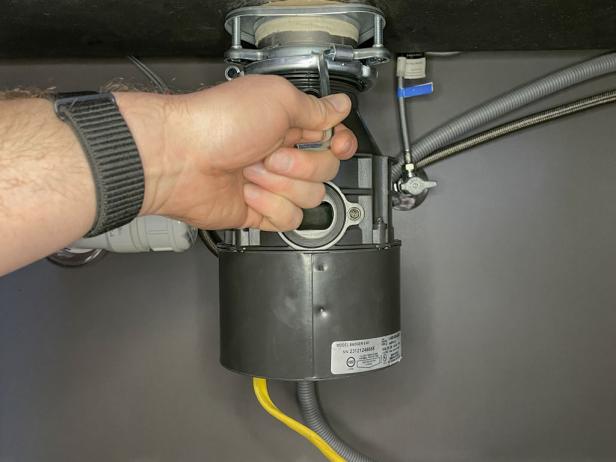
Kamron Sanders
10. Reconnect the Drain and Trap
Using the provided drain adapter to connect the garbage disposal to the drain and trap, reinstall the plumbing components. You may have to change the layout and modify some of the PVC components slightly to accommodate the position of the disposal. In some cases, you may have to buy new pipes and fittings.
Pro Tip: While your existing PVC pipes and fittings may be all it takes to hook your garbage disposal to the drain, there's a chance these materials are worn and won't seal properly. Always inspect used components before attempting to reuse them.
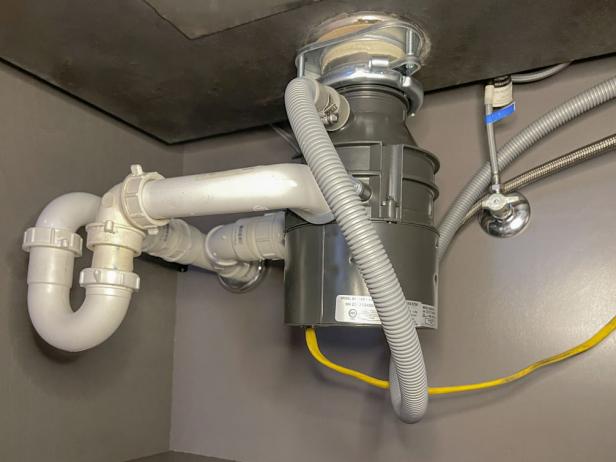
Kamron Sanders
11. Test for Leaks
Once everything is tightened up, turn the water on and test the drain for leaks by filling the sink partially then letting the water drain out all at once. Inspect each joint as well as the area above the garbage disposal.
12. Test the Garbage Disposal
Once you’ve ensured there are no leaks, restore the power and test the garbage disposal. If it engages and runs properly, test it further by dropping food scraps in.
Garbage Disposal Maintenance Tips
Follow these tips to get the most out of your garbage disposal.
- Keep it fresh. Once a week, slice up a lemon and place it in the garbage disposal to keep odors down.
- Stay safe. Turn off the power to the garbage disposal at the breaker before attempting to dislodge items or work on the disposal.
- Don't overwork it. Cut larger items into smaller pieces before placing them in the disposal.
- Run cold water. Run cold water as you use the garbage disposal to help wash away the food scraps. Refrain from using hot water, as this can cause fat to soften and stick to the disposal.
- Use it regularly. Run the garbage disposal often, even if you don't have any food scraps.
- Use ice to clear debris. Chopping ice in the disposal can help remove stuck debris.

.-Battle-on-the-Beach-courtesy-of-HGTV.-.jpg.rend.hgtvcom.196.196.suffix/1714761529029.jpeg)


