How to Construct a Custom Kitchen Range Hood
Marian Parsons

Materials Needed:
- exhaust fan insert and liner (Note: A liner is necessary if range hood is less than 30 inches from cooktop.)
- one 4' x 8' sheet of cabinet grade plywood
- one 1" x 8" x 6' piece of poplar (for arch and bottom pieces of sides)
- one 1" x 6" x 6' piece of poplar (for sides of front panel)
- three 1" x 4" x 6' piece of poplar (for shelf and braces)
- one 4" x 6' piece of trim with a flat back, like chair rail (for shelf)
- one 6' piece of crown molding (for top)
- table saw or circular saw (optional)
- tape measure
- pencil
- combo square
- miter saw
- clamps (at least 2 bar clamps, 2 spring clamps)
- small pieces of scrap wood for clamping
- router (optional)
- flush-trim router bit, shank-side bearing (optional)
- pocket-hole jig (optional)
- 1-1/4" pocket-hole screws
- drill bit for pocket-hole screws
- drill
- 3/4" drill bit
- jigsaw
- 1/4" MDF of luan approximately 1' x 3' (for template)
- finish nailer (hammer and traditional nails may be used)
- stud finder (optional)
- 1-1/4" nails for nailer (optional)
- wood filler
- caulk gun and bright white paintable trim caulk
- sandpaper (150, 180 and 220 grits)
- primer
- paint in desired finish
- 2" sash brush
- 6" foam roller cover and roller
- paint tray
- protective eyewear
Measure and Cut Wood
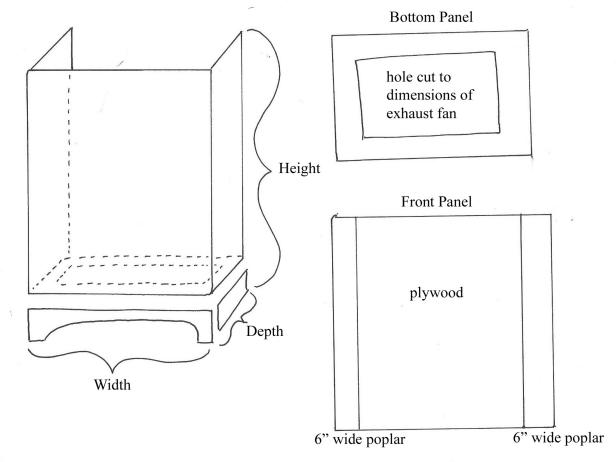
Use a tape measure to determine range hood's desired height, width and depth — be sure to take into account the size of exhaust fan, placement of vent to roof or exterior wall, and size of liner if one is being used. Following range hood plan (Image 1), make a wood cut list for plywood and poplar pieces. To avoid showing a plywood edge, the arch piece, bottom of side panels and side of front panel will be made out of poplar, since those edges will be visible; the remaining pieces are plywood. Tip: Instead of using plywood, 3/4" MDF can be used. Since MDF is smooth, it will not be necessary to use poplar for edges.
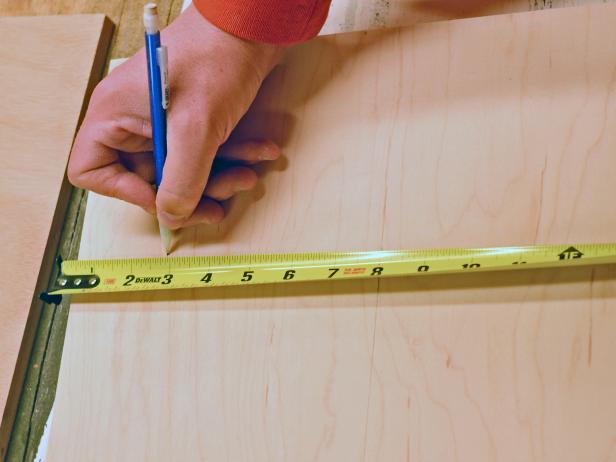
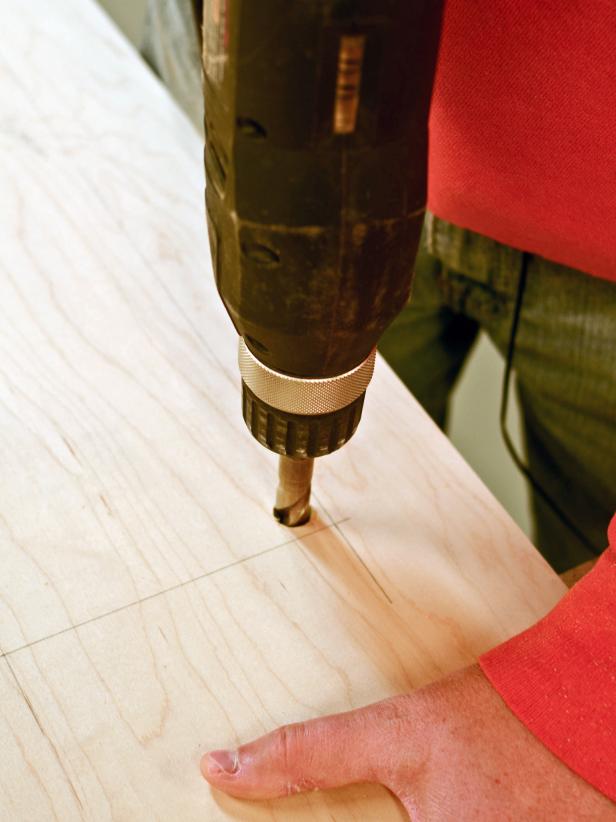
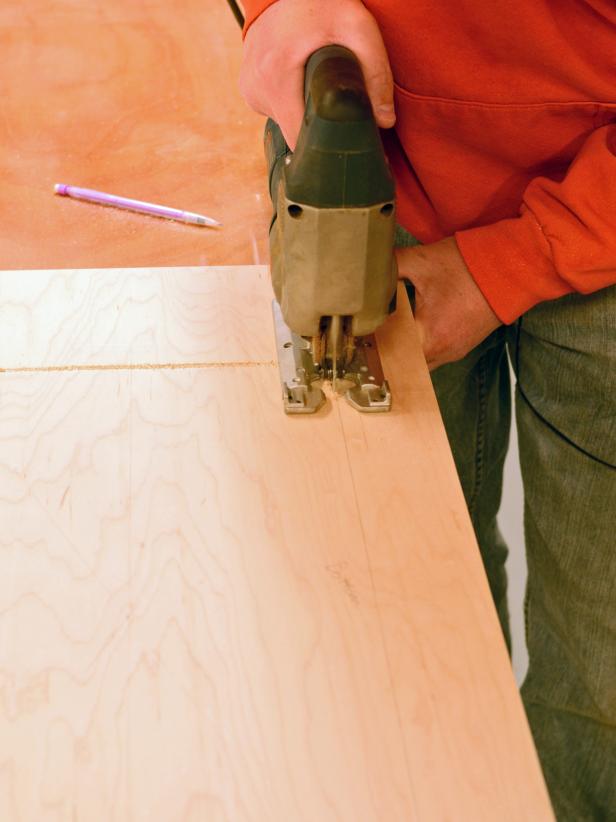
Cut wood to size using a table saw or circular saw and miter saw. If these tools aren't available, pieces can usually be cut to size for free at hardware stores. Bottom piece will hold exhaust fan, so a hole needs to be cut to size. Measure exhaust fan and transfer measurements to piece cut for bottom, marking those with a pencil (Image 2). Drill inside area marked to be cut out with a 1/4" drill bit (Image 3). Insert jigsaw in hole and cut along marked line (Image 4). Lightly sand edges to smooth. Test-fit exhaust fan in cutout before assembling the range hood in the next step.
Marian Parsons
Marian Parsons
Marian Parsons
Marian Parsons
Assemble Range Hood
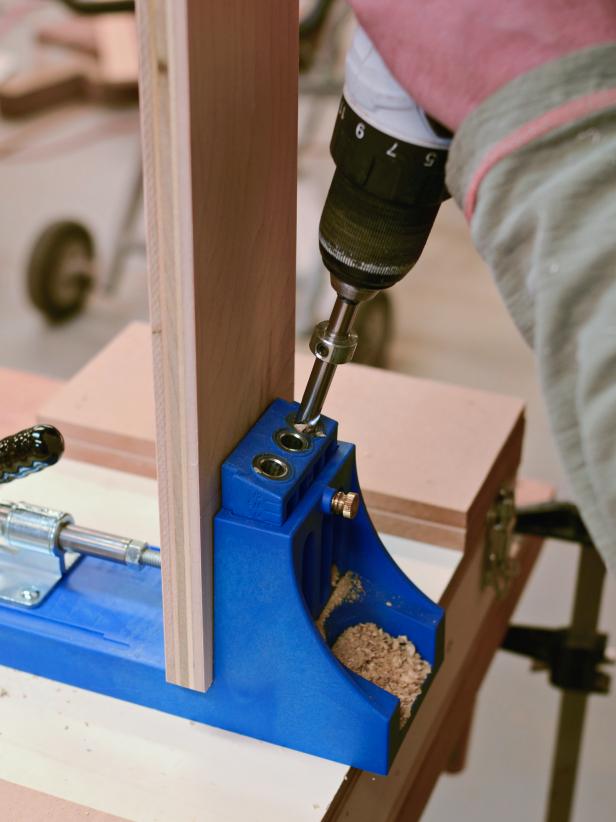
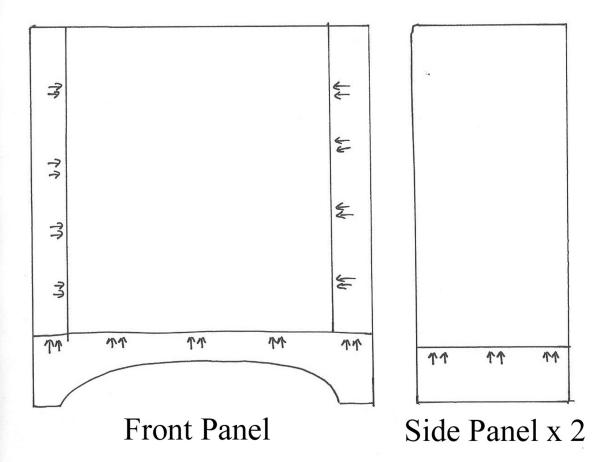
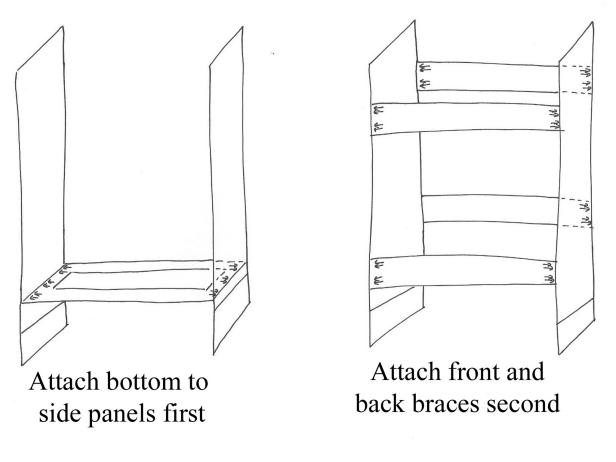
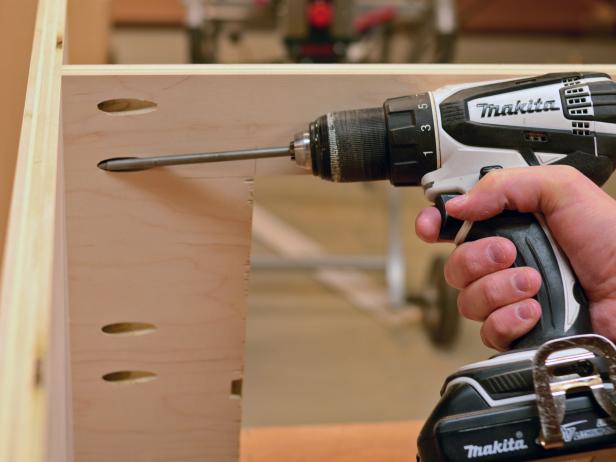
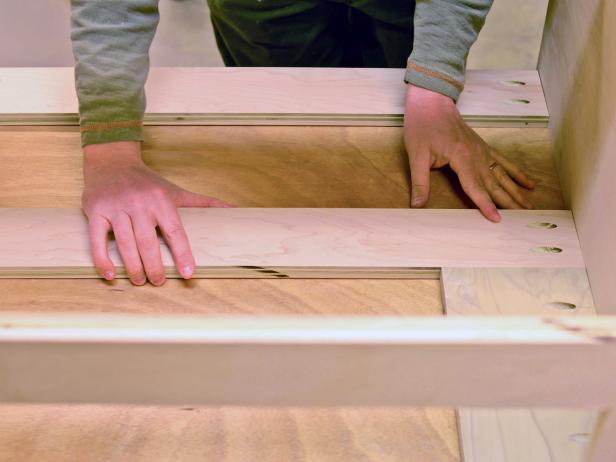
Using a pocket-hole jig and drill equipped with a pocket-hole drill bit, drill holes into poplar pieces that connect to front and side panels (Image 1). Assemble front panel and side panels according to plan (Images 2 and 3). Arrows indicate approximate placement of pocket-hole screws; holes should be drilled into side that will be not be visible when range hood is completed. Apply a small amount of wood filler with finger if there are any visible gaps. Sand panels at seams until smooth. Next, drill pocket holes into bottom piece and attach to side panels with screws according to plan (Image 4). Make sure placement height is correct for proper exhaust fan installation. Add two front braces and two back braces with pocket hole screws as well, following plan (Image 5). Placement of braces does not have to be exact, since they will not be visible, but make sure back braces don't interfere with exhaust fan vent or duct work. Use bar clamps when assembling to hold pieces in place. Tip: Use a scrap piece of wood as a spacer to keep braces square when assembling.
Marian Parsons
Marian Parsons
Marian Parsons
Marian Parsons
Marian Parsons
Dry-Fit Front Panel and Range Hood
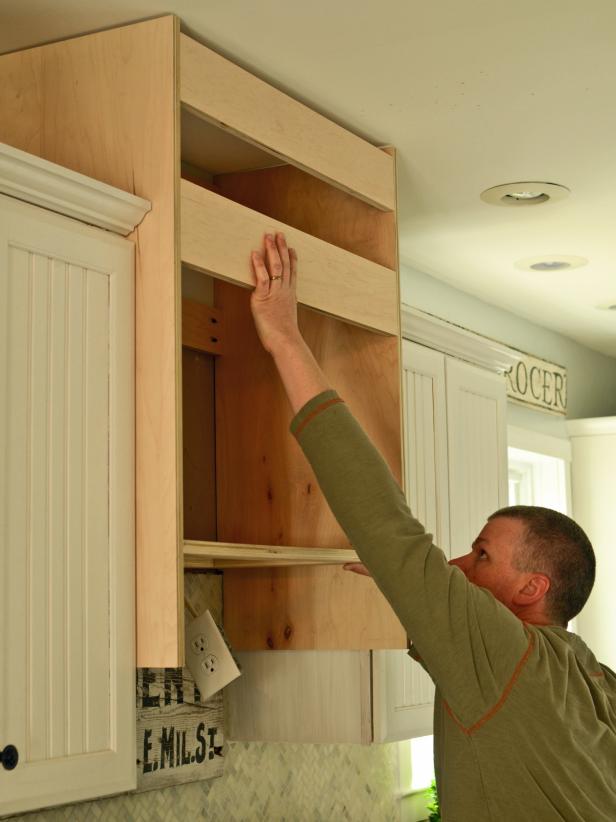
Place range hood on back side and set front panel in place on top to make sure sides line up. Panel should fit perfectly if measurements and cuts were executed correctly. Trim front panel to fit, if necessary. Note: Do not attach front panel in this step. Hold range hood into place to "dry fit" (Image 1). Make any necessary adjustments. Remember that caulk can cover small seams and gaps. Tip: Measure each piece several times before cutting to reduce risk of mistakes.
Marian Parsons
Make Template and Cut Arch
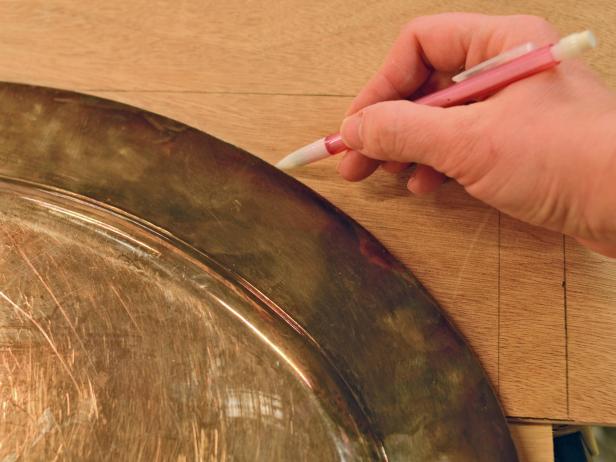
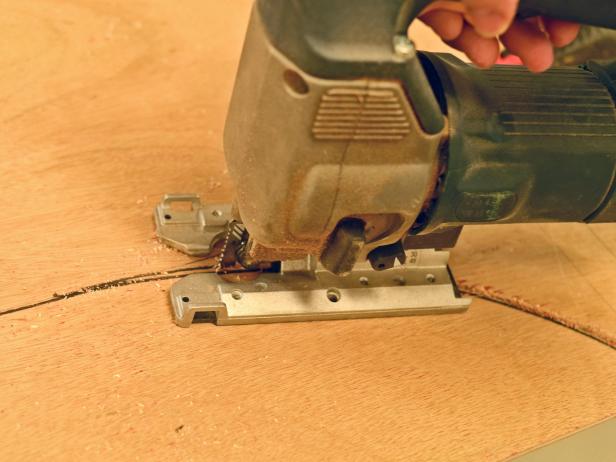
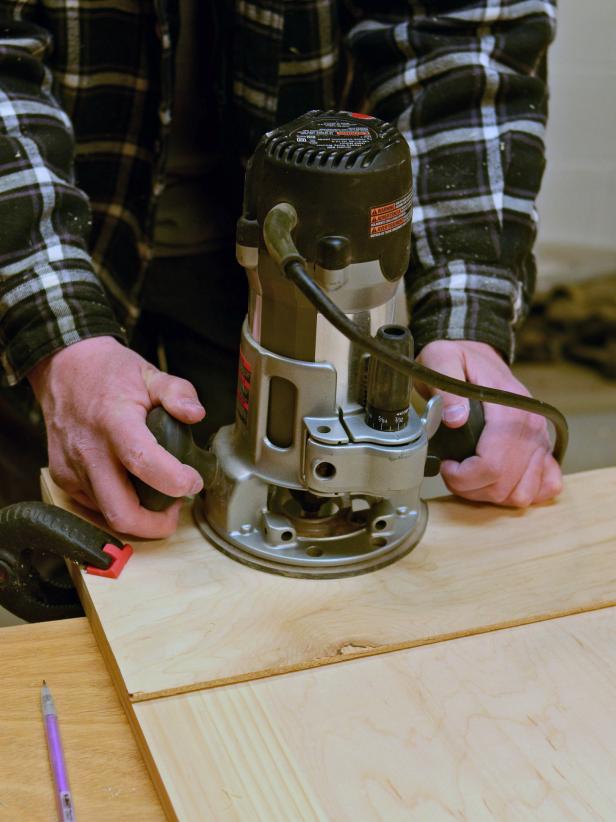
Using a combo square, mark off top and sides of arch on 1/4" MDF or luan to make a template. Leave approximately 2 inches on each side of arch and 2 inches from top of poplar board to allow for pocket holes. Use an oval tray or platter as a template for the curve (Image 1). Clamp MDF to work surface or board with spring clamps to stabilize and cut along arch line with a jigsaw (Image 2). Sand edges smooth. Position template over bottom of front panel and clamp into place with bar clamps. Use router equipped with a shank-side bearing flush-trim bit and let it ride along template to cut arch (Image 3). Tip: If a router is not available, a jigsaw can be used, but the cut will not be as smooth.
Marian Parsons
Marian Parsons
Marian Parsons
Install Exhaust Fan and Range Hood
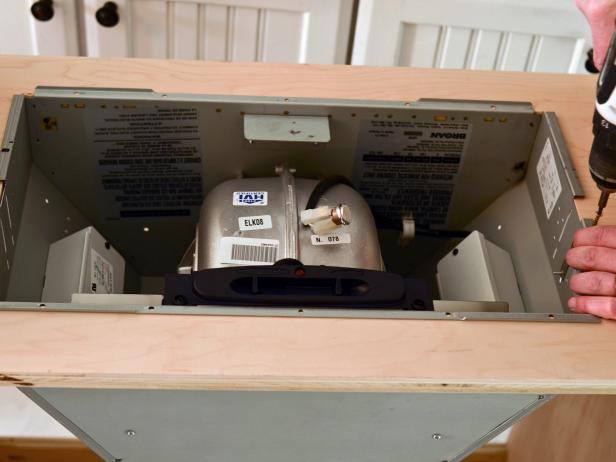
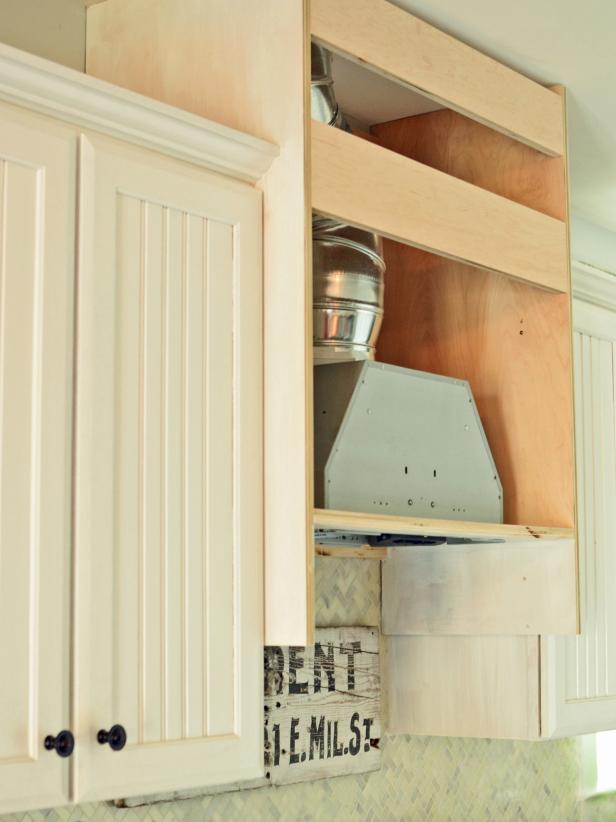
Place range hood on its top and slide exhaust fan into place. If using a liner, also install liner at this point (Image 1). Secure with 1-1/4" wood screws or hardware provided by manufacturer. Locate position of studs in kitchen's rear wall with a stud finder or hammer and small nail. You can also "hear" studs by knocking on drywall and listening for a solid-sounding thud. Mark studs with a pencil just above where braces will be attached. Lift range hood into place and insert 1-1/4" wood screws through back braces into studs. Insert screws through both back braces at all stud locations to secure to wall (Image 2). If installing in a kitchen where cabinets flank range hood, insert a couple of wood screws into adjacent cabinet frames through side panels. Finally, connect exhaust fan to ductwork according to manufacturer's instructions.
Marian Parsons
Marian Parsons
Make Front Shelf
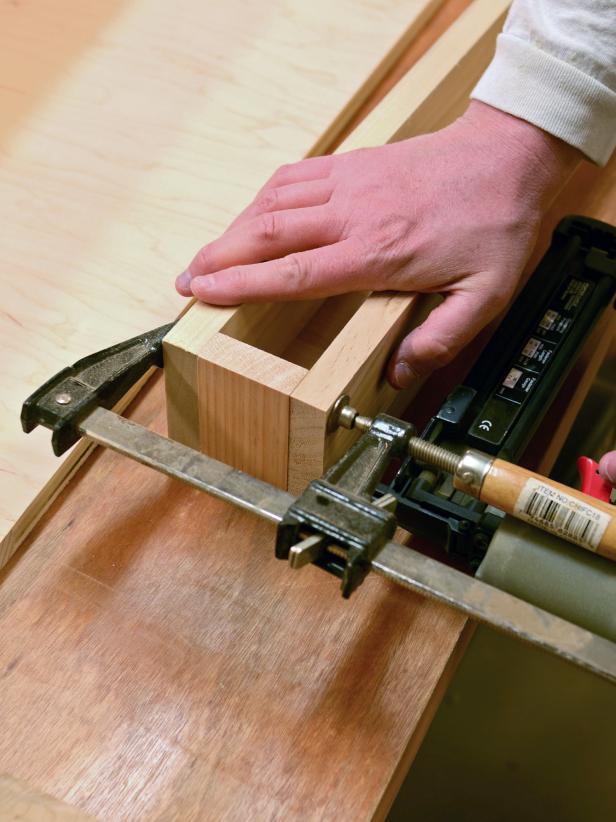
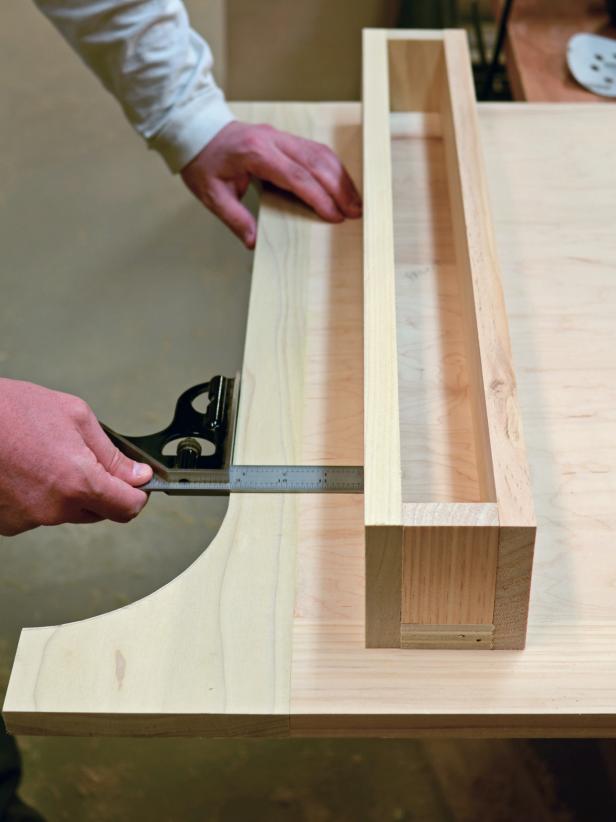
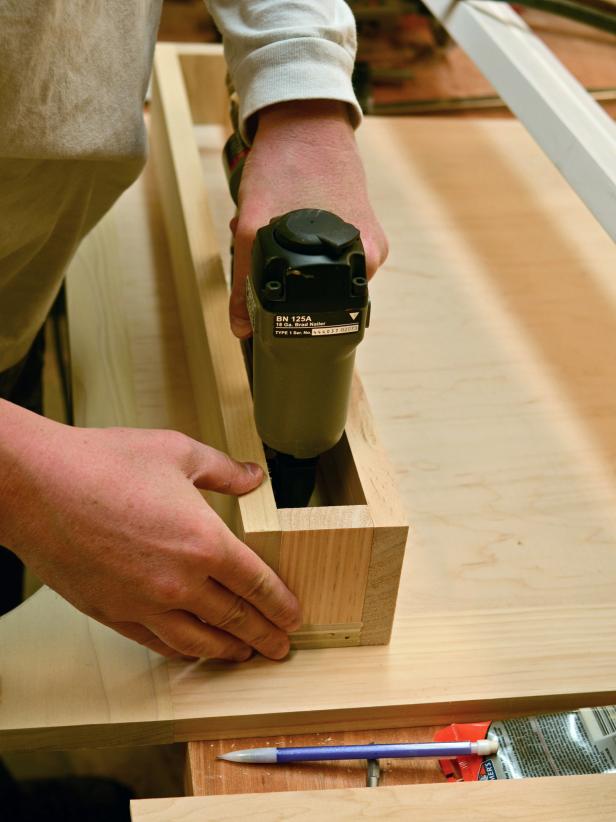
Cut two 1" x 4" poplar pieces to shelf's desired width with miter saw. Measure height of molding chosen to trim out shelf (4" to 6" molding is best). Stack poplar pieces cut for shelf and measure total thickness of both boards. Subtract that number from trim height. Rip down (cut length-wise) a board to the determined measurement to act as spacers and as an anchor for shelf. For example, if trim is 4" high and thickness of two poplar boards is 1 1/2", board should be ripped to 2 1/2". Cut ripped board to shelf length. Cut two small pieces out of waste to fit into sides. Clamp pieces and nail together to assemble a box with front side open (Image 1). Use combo square to determine proper placement on front panel (Image 2). Tack into place with finishing nailer. Secure back of box to range hood's front panel with 1-1/4" wood screws (Image 3). Tip: Rip cuts are made with a table or circular saw. If these tools aren't available, have pieces cut to size at a hardware store.
Marian Parsons
Marian Parsons
Marian Parsons
Trim Out Shelf
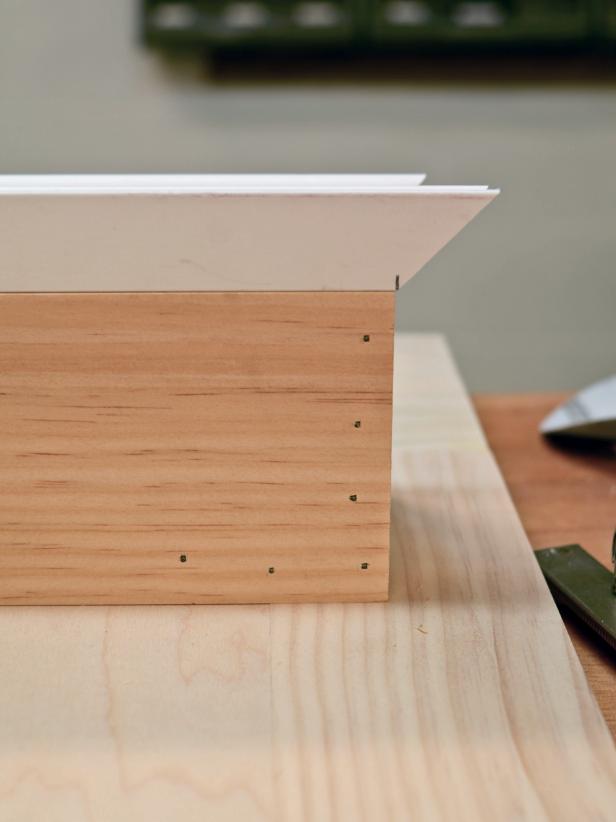
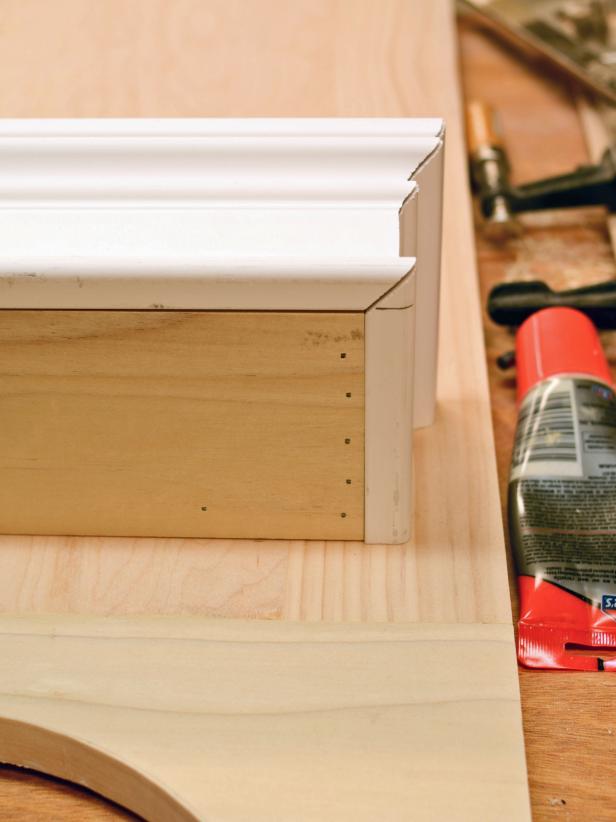
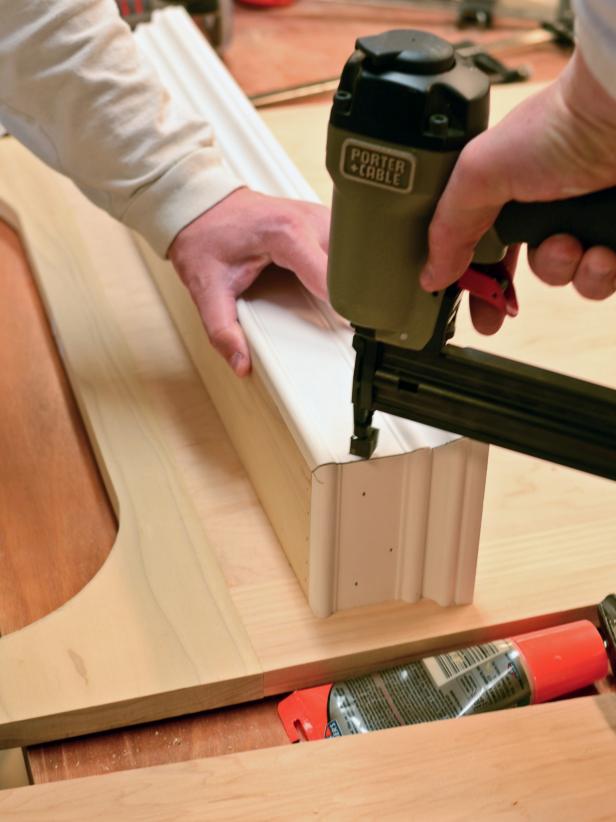
Cut trim ends at a 45-degree bevel to same width as shelf (Image 1). Measurement should be taken from shortest point on trim to fit properly. Cut side shelf side pieces with one 45-degree beveled angle and one straight cut. Dry-fit front and sides to shelf (Image 2) before nailing into place with finishing nailer when lined up (Image 3).
Marian Parsons
Marian Parsons
Marian Parsons
Attach Front Panel and Molding
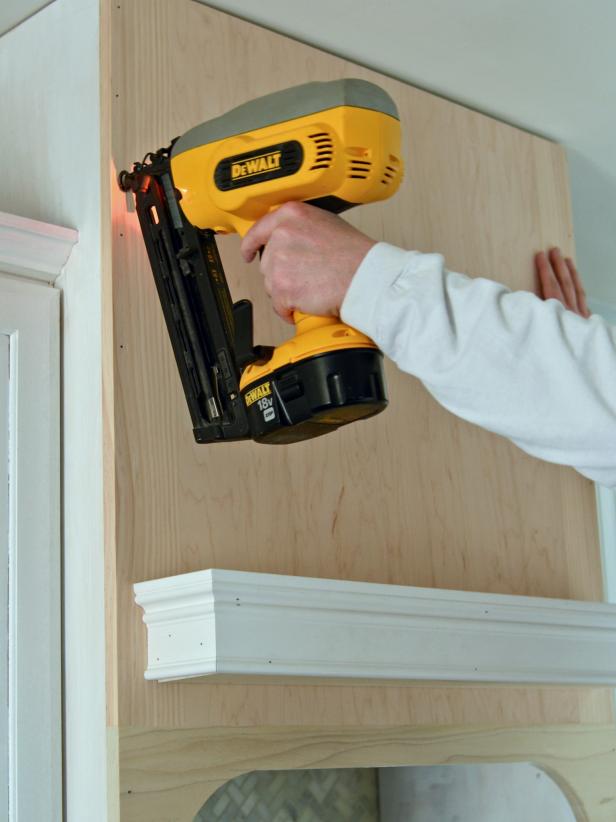
Fit front panel onto range hood and nail in place with finishing nailer (Image 1). Measure width and depth of range hood and cut crown molding to fit. (See Miter Saw Crown Molding Cut Guide for details). Nail crown molding into place with finishing nailer (Image 2). Tip: Fit two pieces together at an angle before nailing into place to ensure angle is consistent.
Miter Saw Crown Molding Cut Guide:
*Miter saw bevel should be angled left at 33.9 degrees for all cuts
INSIDE corner, LEFT side – Position top of molding against miter saw fence, angle set right at 31.6 degrees, left side is finished piece.
INSIDE corner, RIGHT side – Position bottom of molding against miter saw fence, angle set left at 31.6 degrees, left side is finished piece.
OUTSIDE corner, LEFT side - Position bottom of molding against miter saw fence, angle set left at 31.6 degrees, right side is finished piece.
OUTSIDE corner, RIGHT side - Position top of molding against miter saw fence, angle set right at 31.6 degrees, right side is finished piece.
(Note: The left and right sides mentioned above refer to left or right side of the corner, not left or right side of range hood.)
Marian Parsons

Marian Parsons
Caulk, Prime and Paint
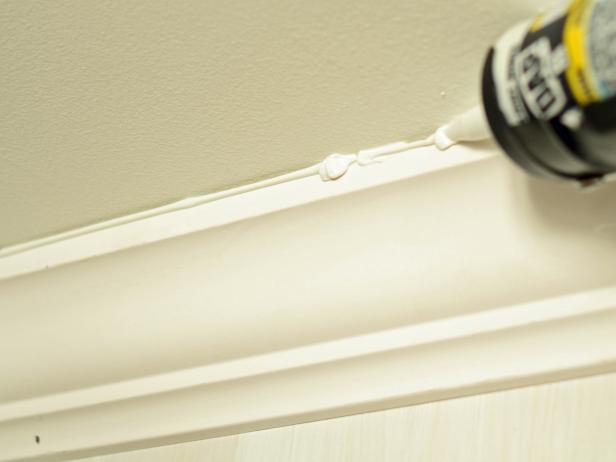
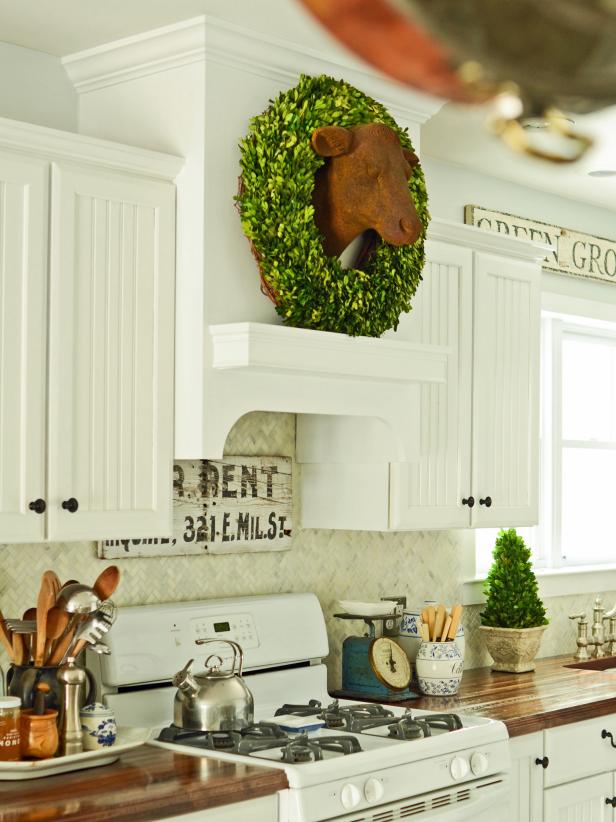
Fill nail holes and small seams with wood filler. Place a small amount on fingertip and rub over hole or seam. Using a caulk gun, apply paintable trim caulk to seams around shelf, crown and trim (Image 1). Run a small bead along seam and smooth with a wet finger or cotton cloth. Allow caulk and wood filler to dry. Sand any rough areas with heavier grit (lower-numbered) sandpaper, working to fine grit. Wipe away dust with slightly dampened cloth. Prime entire range hood by applying a quality primer with 2" sash brush and 6" foam roller. Allow primer to dry and follow with one to two coats of paint applied in same manner as primer (Image 2).
Marian Parsons
Marian Parsons

.-Battle-on-the-Beach-courtesy-of-HGTV.-.jpg.rend.hgtvcom.196.196.suffix/1714761529029.jpeg)


