DIY Halloween Skeleton-Hand Place Card Holders For Your Halloween Dinner Party
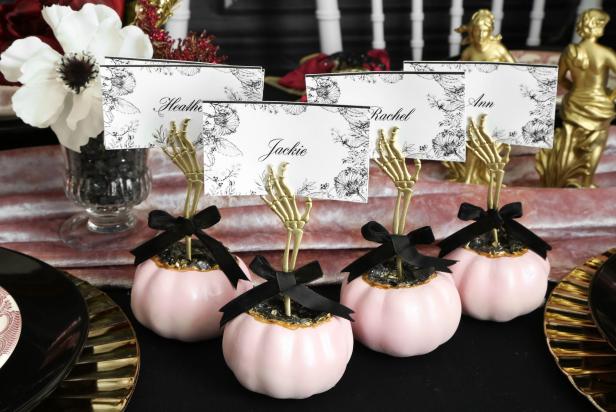
Elevate your Halloween dinner setting or buffet table with these glamourous yet easy-to-make place cards or food label holders. Our free, editable cards with a floral motif make the project easy and elegant.

These DIY skeleton place card holders combine the eerie allure of skeletons with a touch of pink glamour, making them an ideal addition to your sophisticated Halloween party or dinner table. Download our free editable place cards, add your guests' names and then print — super simple!
Heather Baird SprinkleBakes.com
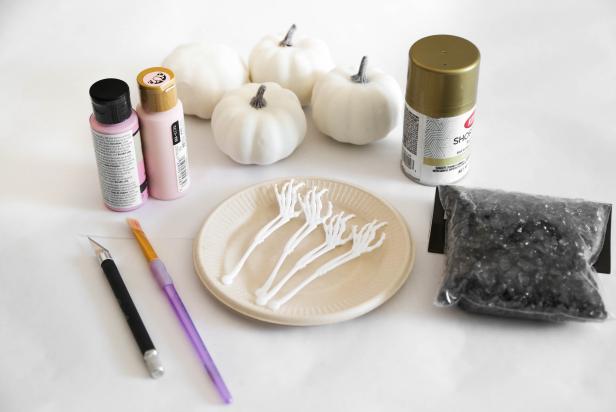
Tools and Materials:
- foam pumpkins
- acrylic pink paint
- craft knife
- gold spray paint
- plastic skeleton-hand motif cocktail picks
- black glass rock vase filler
- glue gun and glue sticks
- gold acrylic paint
- small paintbrush
- scissors
- 1/4” wide black velvet ribbon
- editable place card template
- 8-1/2" x 11" cardstock
Heather Baird SprinkleBakes.com
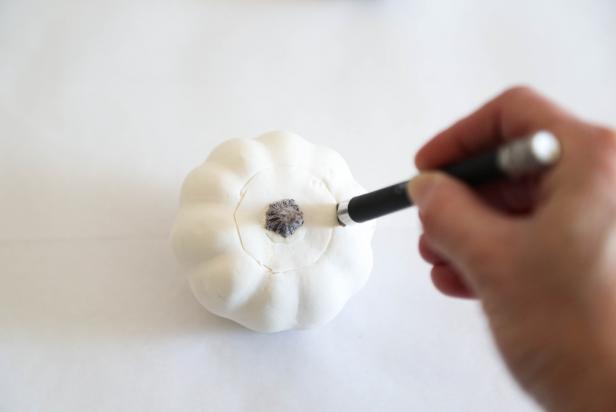
1. Prep the Pumpkins
Begin by cutting a round divot from the stem end of each foam pumpkin using a craft knife. This divot will hold the decorative elements and the pumpkin will serve as a stable base for the place card holder.
Heather Baird SprinkleBakes.com
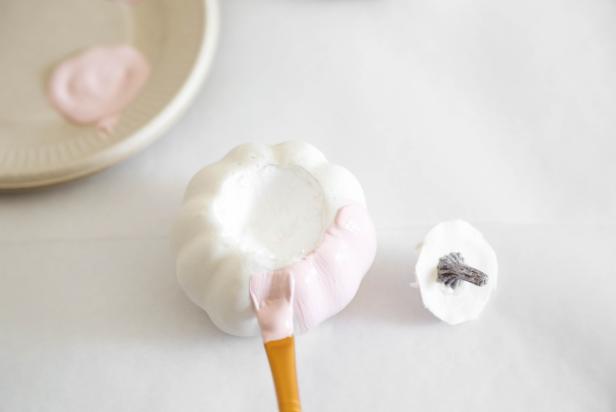
2. Paint the Pumpkins
Use acrylic pink paint to coat each pumpkin's surface evenly. Allow them to dry completely, ensuring that the color is consistent.
Heather Baird SprinkleBakes.com
3. Paint the Hands and Arms
While the pumpkins are drying, spray paint both sides of the skeleton arms with gold spray paint, providing an opulent touch to the creepy-glam aesthetic. Set them aside to dry.

Heather Baird SprinkleBakes.com
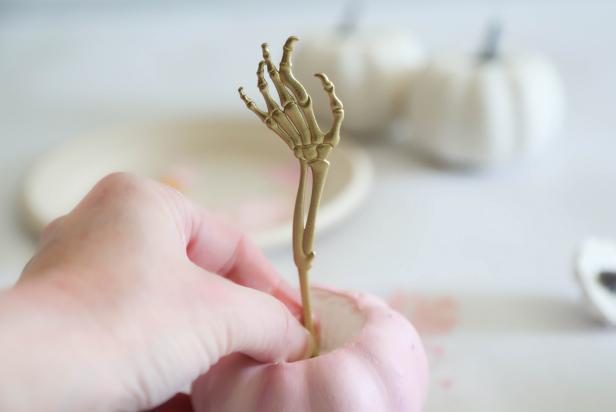
4. Assemble Pick and Pumpkin
When the pumpkins and skeleton arms are dry, insert a skeleton arm upright into the divot of each foam pumpkin. Make sure the arm stands firmly inside the divot.
Heather Baird SprinkleBakes.com
5. Add Pebble Filler
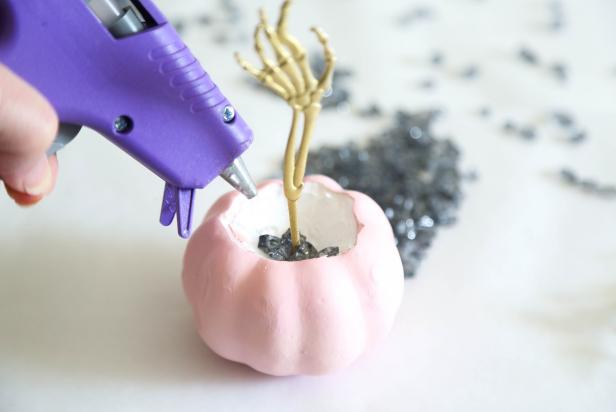
Pour some of the black glass rock vase filler into the divot and use the glue gun to secure some the rocks around the skeleton arm until you get to the top of the divot. This will add stability and add geode-crystal sparkle.
Heather Baird SprinkleBakes.com
6. A Touch of Gold on the Rim
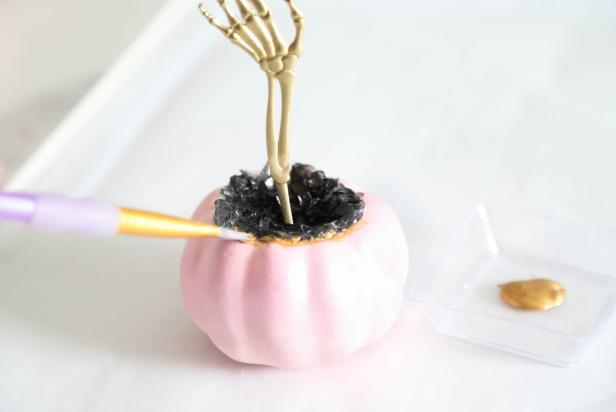
Use gold acrylic paint and a small paintbrush to paint a thin line along the top edge of each pumpkin. This touch of gold will accentuate the glass rock filler.
Heather Baird SprinkleBakes.com
7. Velvet Touch
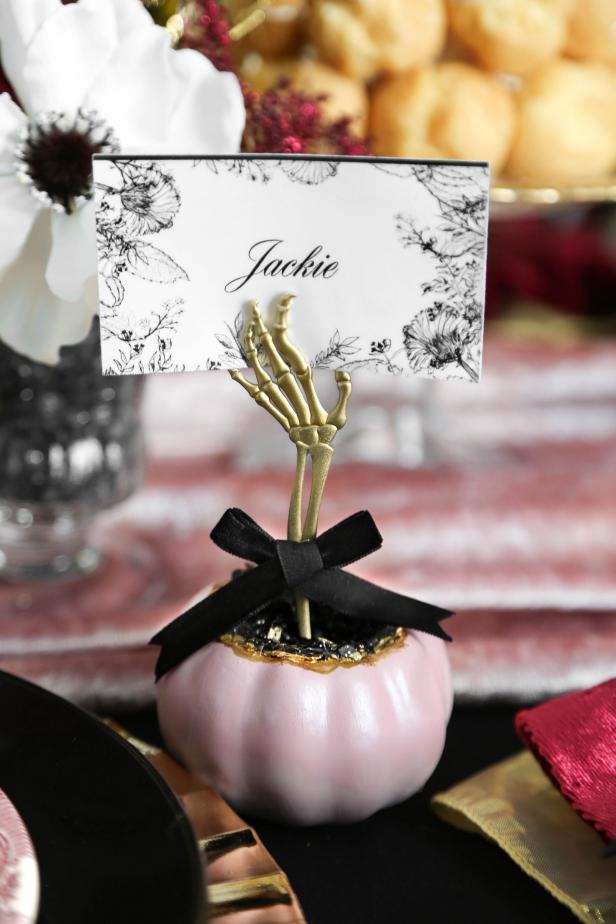
Cut the black velvet ribbon into appropriately sized pieces for bows. Use the glue gun to carefully attach a bow to each of the skeleton arms. Finally, insert printed place cards into the skeleton hand on each place card holder. This eerie yet stylish way of seating guests adds a fun and spooky element to your Halloween table.
Heather Baird SprinkleBakes.com

.-Battle-on-the-Beach-courtesy-of-HGTV.-.jpg.rend.hgtvcom.196.196.suffix/1714761529029.jpeg)


