Budget-Friendly Favors: Easy Plaster-Dipped Flowers + Succulents
Dip inexpensive faux flowers and succulents into plaster to create delicate mini sculptures that look like pricey porcelain. Perfect as wedding favors or as a one-of-a-kind gift topper or place card.
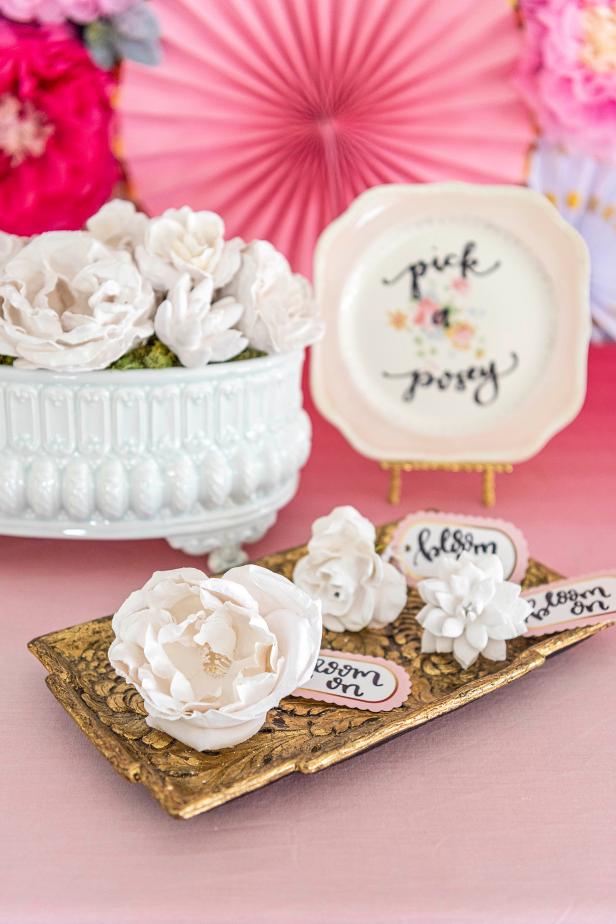
Sarah Busby; Styling by H. Camille Smith

Materials Needed
- artist-grade plaster
- faux succulents (flocked are best)
- stiff white silk flowers with a spiral shape (rose, ranunculus or dahlia)
- sealed cardboard box
- awl or large nail
- heavy-duty snips (for cutting silk flower stems)
- plastic bowl for dipping
- plastic spoon
- drop cloth, plastic sheet or newspaper to protect work surface
- jardinière or similar decorative container
- floral foam
- preserved moss
- small decorative tags
- permanent marker
Note: When selecting silk blooms, be sure to pick flowers with stiff fabric so they'll hold their shape once dipped and that are white — any other color may bleed.
Prep Workspace + Faux Plants
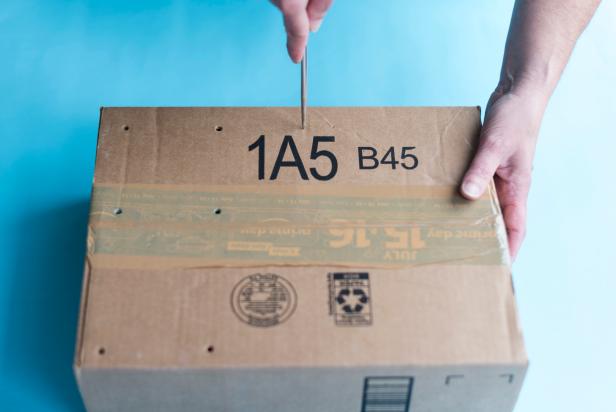
Plaster is super messy so, before beginning, cover workspace with a drop cloth, plastic sheet or newspaper. Use an awl or large nail to poke evenly spaced holes in a sealed cardboard box (Image 1) which will serve as a drying rack for the dipped plants. Trim all silk flower and succulent stems, leaving each just 2-3 inches to serve as a handle for dipping (Image 2).
Sarah Busby

Sarah Busby
Mix Plaster
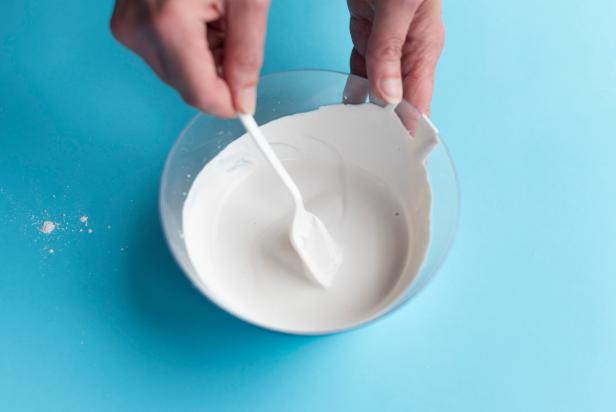
Follow manufacturer’s directions on powder-to-water ratio (Image 1) to mix just enough plaster to dip around 8 flowers or succulents at a time. Mix plaster in a plastic bowl (which will make it easier to remove dried plaster later) using a disposable spoon (Image 2). Note: The plaster sets up quickly, leaving you with only approximately 5 minutes of working time so you’ll be mixing and dipping in multiple batches.

Sarah Busby
Sarah Busby
Dip Flowers
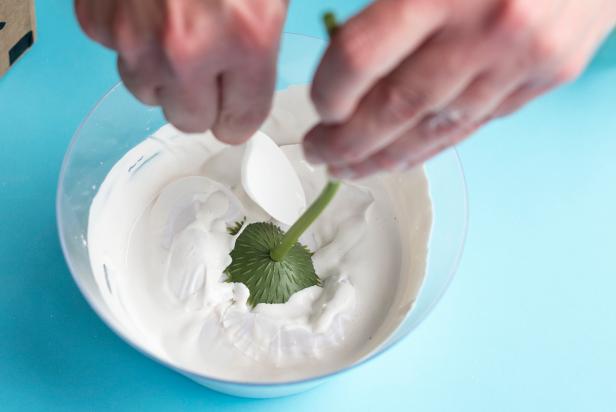
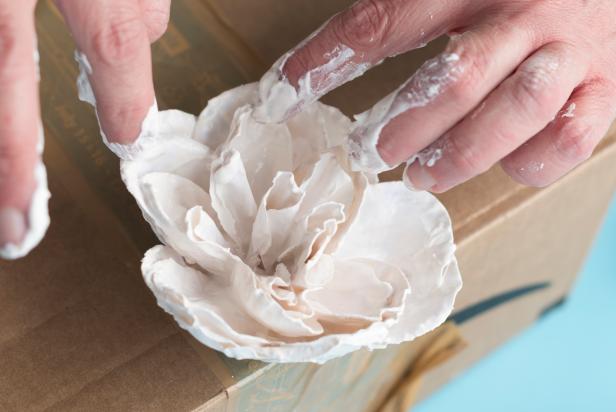
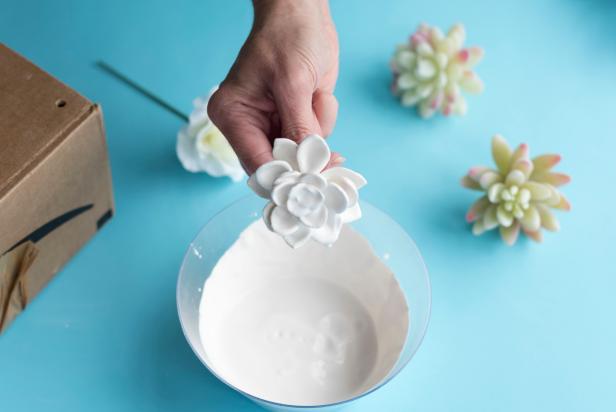
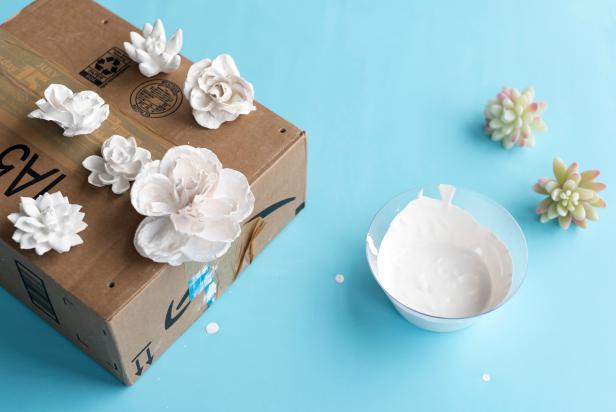
Holding the flower by its short, pre-trimmed stem, dip bloom into the plaster mixture, using the spoon to coat the back side of the flower with plaster (Image 1). Swirl the flower around and move from side to side to ensure that each petal is coated, then hold the bloom above the bowl and gently shake to remove excess plaster (Image 2). Place dipped bloom in one of the pre-punched holes in the cardboard box to dry and, if necessary, use your fingers to arrange the petals so they'll dry in an attractive position (Image 3).
Sarah Busby

Sarah Busby
Sarah Busby
Dip Succulents
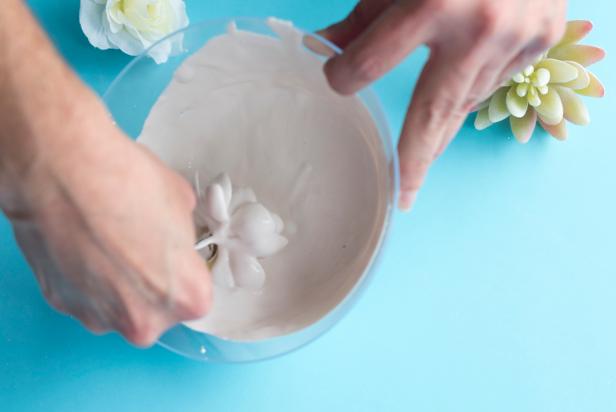
Follow the same steps as the flowers above (Images 1 and 2). Note: Thanks to their plastic composition, succulents are easier to coat in plaster than the flowers whose fabric petals tend to absorb the plaster resulting in a thinner coat.
Sarah Busby
Sarah Busby
Clean Bowl + Mix Fresh Plaster
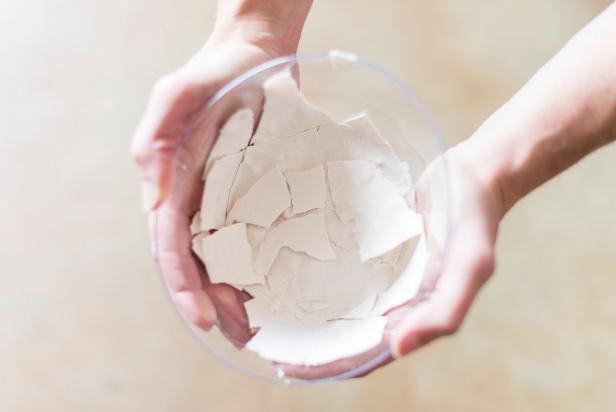
Depending on how many plants you’re dipping, you may need to mix several batches of plaster. If reusing a plastic bowl, be sure to fully clean it between batches by allowing the plaster to completely dry, then compressing the sides of the plastic bowl to crack the dried plaster (Image 1) and discard. Following manufacturer's mixing ratio, mix up a fresh, small batch (enough to dip around 8 plants) of plaster (Image 2).
Sarah Busby
Sarah Busby
Touch Up Plaster
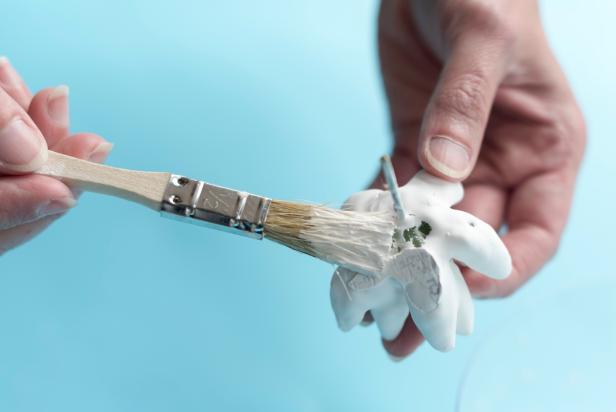
Depending on the fabric used in your chosen silk blooms, they may need a second dip in the plaster, after the first coat has fully dried, for full coverage (Image 1). If not, you can just use a chip brush to touch up any areas of the flower or succulent, like where they rested on the cardboard box, that aren’t properly covered (Image 2). Set aside on a paper towel or drop cloth, instead of back in the punched box, and allow the touched-up area to fully dry.

Sarah Busby
Sarah Busby
Style as Part of Each Place Setting
For a small gathering, simply add a handwritten tag and place a single plaster bloom or succulent in the center of each guest's plate as a party favor or place card.
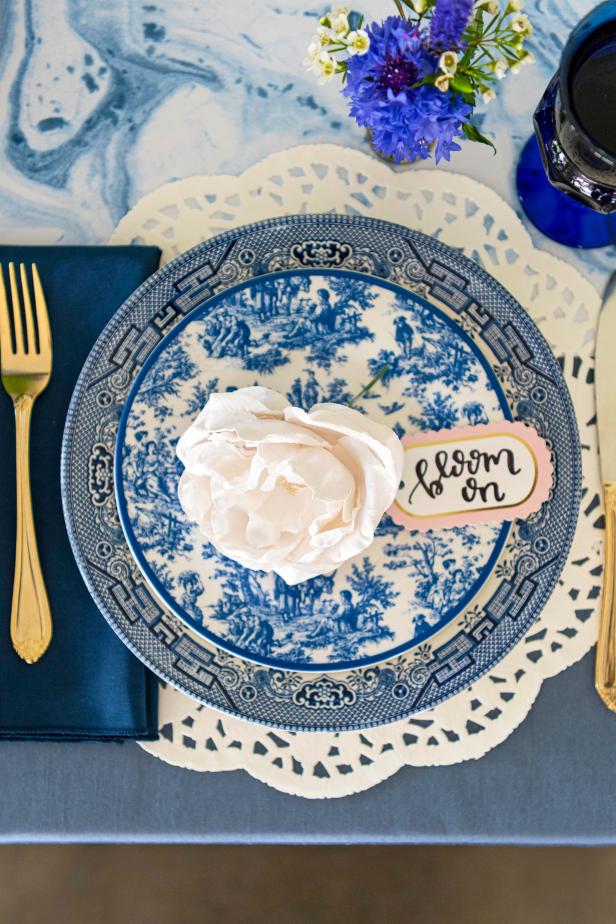
Sarah Busby; Styling by H. Camille Smith
Or, Create a Centerpiece
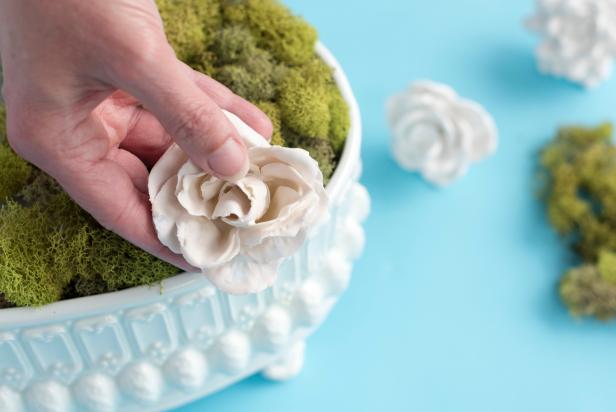
To create a display, fill jardinière or similar decorative container with florist foam bricks (Images 1 and 2). Cover with preserved moss (Image 3), then fill with plaster favors (Image 4).
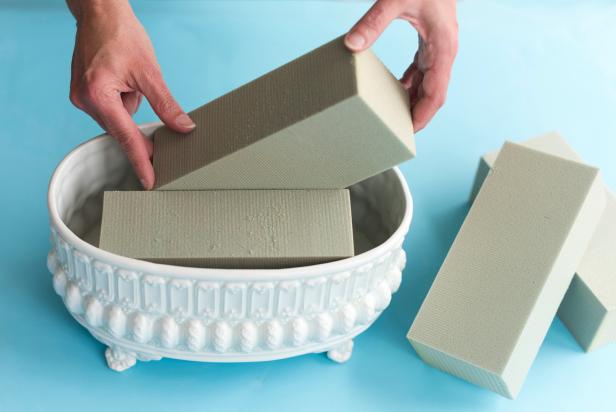
Sarah Busby
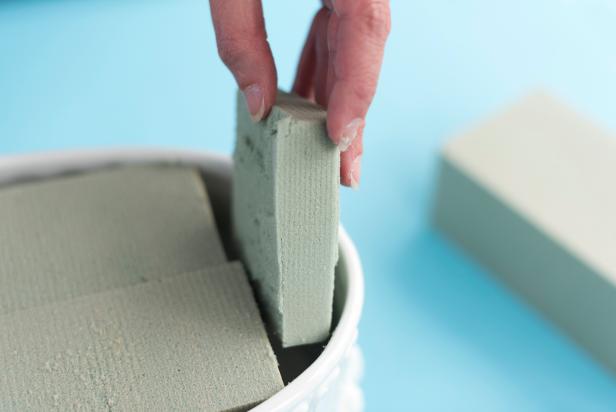
Sarah Busby
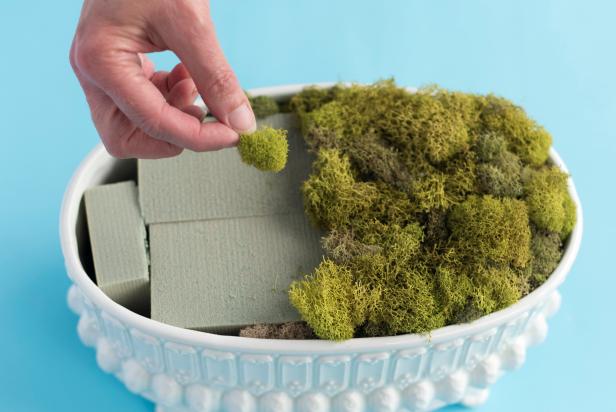
Sarah Busby
Sarah Busby
Style as a Favor Table
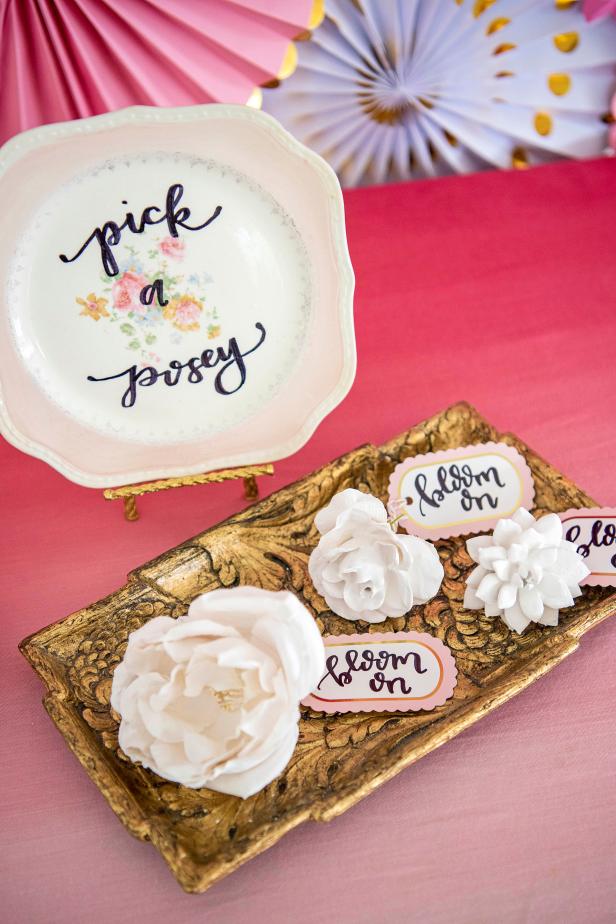
For weddings or larger parties, use your DIY favors as part of the decor while making it easier for your guests to grab one on their way out by setting up a favor table (Image 1). Display some of the plaster-dipped favors as a centerpiece or add tags with a handwritten note or the couple's initials or the date (Image 2).

Sarah Busby; Styling by H. Camille Smith
Sarah Busby: Styling by H. Camille Smith

.-Battle-on-the-Beach-courtesy-of-HGTV.-.jpg.rend.hgtvcom.196.196.suffix/1714761529029.jpeg)


